This is my first post about creating a personal blog. I plan to create my own blog using a static site generator, and a free host service to host my created blog.
I first tried to use Jekyll for generating my static site. But I found out I’m more familiar with Go language, so I decided to use Hugo - a build-website framework. And I’ll use Github Page to host my blog site, it’s totally free according to my plan.
Presiquite
Before proceeding, I assume that you have these requirements:
- Familiar with Markdown
- Github account
Install Hugo
I’m using Homebrew on Mac OS for this guide. To install Hugo, open a terminal:
$ brew install hugo
$ hugo version# verify hugo installed
Create a new project
Open a terminal and cd to your workspace.
$ hugo new site quickstart
$ ls# there’ll be a folder named quickstart
Add a theme
A theme will describe how your blog looks like (its color, format, content .etc). See themes.gohugo.io and look for what fits your taste. I’ll choose zzo theme for this guide.
- Go to the theme’s Github repository and download it. (In my choice, it is hugo-theme-zzo).
- Ectract that downloaded zip file. Then rename it to
zzo, and move the folder toquickstart’s themes folder.
The folder structure should look like this:
├── quickstart
│   ├── archetypes
│   ├── config
│   ├── content
│   ├── ...
│   └── themes
│       └── zzo
Then copy config, content, resources folders in themes/zzo/exampleSite/ and paste them inside quickstart/.
Add your own blog post
The folder content we’ve just copied, contains our blog posts. These blog posts are written in Markdown, plus extra Hugo’s terms. Let’s add a post.
- Copy
markdown-syntax.md(incontent/en/postsfolder) file into a new file namedmy-first-post.md. - Open
my-first-post.md, edit its content like so:
|
|
dateis when you write;descriptionappears in Home’s blog list;draftfalse to publish it in deployment.
Start the Hugo server
$ hugo server
…
Web Server is available at http://localhost:1313/ (bind address 127.0.0.1)
Press Ctrl+C to stop
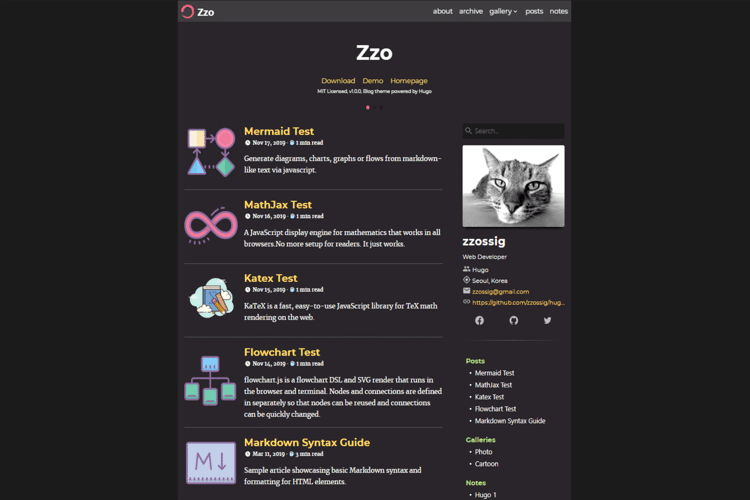
- Then access your site at http://localhost:1313/, you should see something similar to this:
Customize the Theme
Open config.toml file, change its baseURL, title .etc; anything that might be your own personal information. The baseURL will be my blog address on Github Page.
|
|
You should refer to the chosen Theme’s documentation for how to customize it properly. Every theme should have a Home page for documentation and Demo; look for them.
Create your site address on Github Page
-
Login to Github, and create a repository named
<your username>.github.io. Let’s assume your Github username isquickstart, then baseURL inconfig.tomlwill match your repository, ex:https://quickstart.github.io/. -
Clone
quickstart.github.iorepository to your local machine:
$ git clone https://github.com/quickstart/quickstart.github.io.git
- Now, go to quickstart.github.io repository’s
Settingand scroll to GitHub Pages section; choose theSourcetoBranch: main; then clickSave.
Deploy your project
- Change to
quickstartproject directory and build your static site:
$ hugo
- Your site content will be generated to a folder named
public. - Then change to
qickstart.github.iorepository directory and add your generated content:
$ rm ./**
$ cp -r <quickstart>/public/** ./
Line #1 removes old content, do this from the second time you deploy your site. And line #2 copies quickstart/public/’s content into quickstart.github.io’s content.
- After that, make your content to remote.
$ git push origin main
- Finally, your site is live. Visit it at
https://quickstart.github.io/.